⚡ Executive Summary: Mastering the Craft and Chemistry of Indian Mehendi Photography
The Mehendi ceremony is widely celebrated as one of the most vibrant, joyful, and intimate milestones of the great Indian wedding. Yet for lead photographers and studio owners, it poses a complex optical and ergonomic labyrinth. Between heavy green shamianas reflecting muddy hues onto Indian skin tones, dark wet henna paste causing blown specular highlights, and a bride trapped in a chair for six consecutive hours with wet palms, traditional photography workflows break down rapidly.
This 2026 definitive masterclass breaks down the complete technical blueprint used by India's top luxury wedding studios. Learn how to tame tricky micro-depth of field, eliminate green tent color contamination in-camera, direct high-fashion seated poses without bridal fatigue, and streamline client proofs effortlessly using Pixelect SmartSelection.
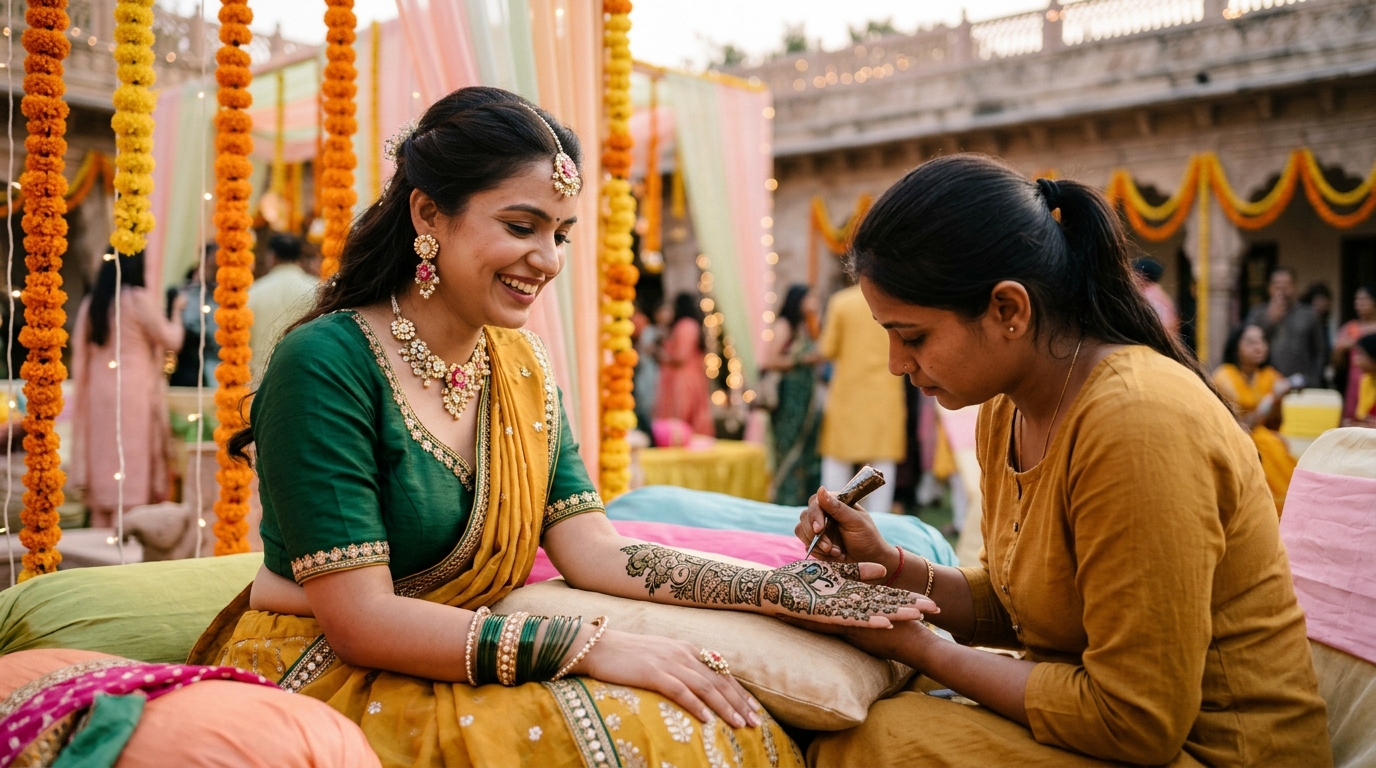
Unlike high-speed Sangeet performances or solemn late-night Mandap rituals, the Mehendi ceremony is an exercise in microscopic precision juxtaposed against outdoor festival chaos. The bride sits enthroned amidst laughter, dholak beats, singing relatives, and flowing chai. Her hands and feet are turned into living canvases of intricate Mughal motifs, peacock flourishes, and hidden groom initials.
However, studio teams consistently stumble on three critical bottlenecks: unflattering depth-of-field blur on arched hands, sickly neon-green skin tones caused by lawn decor, and exhausted brides who stiffen after hours of immobility. Below is the systematic playbook to overcome these obstacles and create portfolio-defining imagery.
🌿 1. The Optical Physics of Henna: Micro-Textures, Wet Paste vs. Cured Stains & The Depth of Field Dilemma
Photographing henna is an exacting macro discipline disguised as wedding documentation. When henna paste is freshly applied from a fine plastic cone, it possesses a glossy, wet three-dimensional bead. This wet ridge acts like an array of miniature convex mirrors, bouncing every harsh light source directly back into your camera sensor as blown-out specular highlights.
Conversely, once the henna dries, it darkens into a matte, earthy texture before flaking off to reveal the initial orange-tinted stain. Each phase demands a deliberate optical strategy:
- The Wide-Aperture Trap (f/1.4 vs. f/3.5): Many photographers shoot their 85mm or 50mm lenses wide open at f/1.4 or f/1.8. While this creates luscious background bokeh, the focal plane on an outstretched hand angled toward the lens is razor-thin (often less than 5mm). The bride's fingertips remain sharp, but the palm motifs, wrist cuffs, and engagement ring turn into muddy mush. For detailed henna portraits, step down to f/3.2 – f/4.0 to keep the entire hand plane razor-sharp while letting the distant courtyard fall into dreamy blur.
- Cross-Polarization and Diffused Soft Grazing Light: Direct on-camera flash kills henna depth by flattening the raised texture and creating hot spots. Instead, position a continuous high-CRI LED or speedlight with an octabox at a 45-degree angle relative to the bride's palm. The directional skimming light catches the dimensional ridges of the paste, casting micro-shadows that emphasize every delicate stroke.
- Focal Length Hierarchy: A 90mm or 105mm dedicated macro lens is an indispensable asset for capturing the groom’s hidden name and bridal jewelry accents. For environmental medium shots, a fast 35mm f/1.4 or 50mm f/1.2 captures the bride interacting with her henna artists and bridesmaids in full contextual glory.
When capturing dried henna before the bride washes it off, the paste often looks powdery and pale. Ask the bridal makeup artist to gently mist a fine vapor of lemon-sugar syrup or dab a single drop of coconut or eucalyptus oil along the perimeter of the forearm with a cotton pad. This restores a rich, lustrous, organic sheen without dissolving the intricate line work, making hand shots look intensely three-dimensional under warm directional light.
🎪 2. Neutralizing the "Green Shamiana Nightmare": Mixed Daylight, Artificial Turf & Color Cast Neutralization
Ask any experienced wedding retoucher about their biggest post-production headache, and they will point to Mehendi photos shot under outdoor shamianas. Event decorators frequently construct Mehendi lounges using vibrant lime-green fabric drapes, bright green astro-turf carpeting, and dense overhead foliage.
When harsh midday sunlight hits these materials, it creates massive secondary light sources emitting strong green wavelengths (520–550 nm). This bounce light floods directly into the bride's jawline, neck, earlobes, and hands, producing an unflattering, sickly greenish-yellow cast that ruins Indian olive skin tones.
Tackling this requires a strict three-pillar in-camera and calibration workflow:
- Overpowering Ambient Green Bounce with High-CRI Key Light: Never rely purely on natural ambient light under colored tents. Bring in a portable high-output LED fixture (such as a Godox ML60II Bi or Aputure 60x with a high-diffusion lantern) rated at CRI 96+ / TLCI 98+. Position this light within 4 to 5 feet of the bride, feathering it across her face and hands. By making your clean 5500K key light 1.5 to 2 stops brighter than the ambient bounce, you effectively suppress and drown out the unwanted green contamination.
- Dialing Manual In-Camera Kelvin & Tint Offsets: Never shoot Mehendi sessions on Auto White Balance (AWB). Set a manual color temperature between 5000K and 5300K, and deliberately dial the camera's internal Tint axis toward Magenta (+6 to +12). This offsets the green spill right at the raw sensor capture stage.
- Shooting a 5-Second Custom ColorChecker Profile: Before the bride sits down, place an X-Rite ColorChecker or Calibrite Passport in her seating position and take one calibration RAW frame under the exact lighting setup. Generating a custom Dual-Illuminant DNG profile in Lightroom allows you to pull down parasitic greens while preserving golden marigolds and natural warm skin undertones in seconds.
Novice retouchers often attempt to fix green shamiana casts by pulling down the global "Green" saturation slider in Lightroom or Photoshop. This is a fatal mistake. It immediately drains the life from expensive floral decor, emerald jewelry, and lehenga embroidery, leaving behind a dull, muddy gray. Instead, use localized Hue-Saturation-Luminance (HSL) targeted adjustments, shift Green hue toward Cyan (+15), and apply warm tone masks restricted specifically to skin highlights.
🪑 3. The Flawless Seated Bridal Posing Framework: Directing Motionless Brides with Effortless Luxury
Unlike Western bridal portrait sessions where the subject can walk, twirl, and reposition, an Indian Mehendi bride is physically constrained. With wet henna wet on both palms, forearms, calves, and feet, she cannot touch her face, adjust her dupatta, sip water without assistance, or shift comfortably. After two hours, bridal fatigue inevitably sets in, causing slumped shoulders and forced smiles.
To keep your portraits dynamic, editorial, and flattering, implement the Five Signature Seated Compositions:
- 1. The Overhead 45° Symmetrical Mandala Reveal: Position yourself on a low step stool or shoot from a high vantage point at a 45-degree angle. Have the bride rest her elbows comfortably on plush bolster pillows (masnads) and gently angle both palms upward toward the lens. The circular mandala patterns on both palms align symmetrically, framing her smiling face in the upper third of the frame.
- 2. The "Peeping Gaze" Henna Curtain: Direct the bride to bring her wet hands toward her cheekbones without touching her skin (leaving a 2-inch safe clearance). Frame tightly with an 85mm prime. Focus sharply on her eyes through the delicate gap between her henna-clad fingers, creating a dramatic, intimate editorial look reminiscent of classic Indian royalty.
- 3. The Intricate Anklet & Foot Arch Geometry: While the henna artist applies patterns to the bride’s feet, crouch at ground level. Frame the arch of her foot, adorned with traditional silver payal (anklets) or floral foot jewelry, with the background softly blurred. Use a small rim reflector to illuminate the intricate ankle lacework.
- 4. The Candid Dholak & Bridesmaid Interaction: When family members gather to sing folk songs or tease the bride, switch to a 35mm lens. Capture natural micro-moments: the bride laughing hysterically, her sister feeding her mithai, or the henna artist concentrating with laser focus. These unposed storytelling moments often become the couple's favorite album spreads.
- 5. The Macro Ring & Finger Tip Architecture: Once the artist completes the delicate fingertips, bring in your macro lens. Capture the engagement solitaire ring gleaming amidst fresh henna flourishes. Ensure the aperture is set to f/5.6 to keep the faceted gemstone and adjacent skin patterns equally crisp.
Never ask a bride to hold her arms suspended in mid-air for more than 15 seconds. Her forearm muscles will tremble, causing micro-motion blur in your photos and physical distress. Always instruct your assistant to tuck two firm velvet bolster pillows beneath her elbows. This supports her upper body weight, relaxes her trapezius muscles, and naturally straightens her posture without tension.
📊 4. The Mehendi Studio Workflow Evolution: Old Manual Chaos vs. Modern Pixelect Ecosystem
Because Mehendi ceremonies involve non-stop candid interactions and repetitive hand detail bursts, a standard two-shooter team easily captures between 2,500 and 4,000 RAW files in a single afternoon. Under traditional studio operations, this avalanche of similar images leads to massive editing backlogs, delayed client selections, and lost client enthusiasm.
Here is how high-performance wedding studios leverage modern software automation to leapfrog traditional competitors:
📋 5. The 4-Step Actionable Mehendi Ceremony Checklist
Follow this standard operating procedure on every Mehendi assignment to ensure bulletproof technical execution and rapid delivery:
Arrive 45 minutes prior. Inspect the bride's designated seating area. If green grass or lime fabric lines the ceiling, immediately set up your high-CRI key light and position a white bounce card to counteract upward green bounce. ✅
Lock manual white balance at 5200K, shift tint to +8 Magenta, and take a ColorChecker test frame. Verify both cameras are writing uncompressed RAW simultaneously to Slot 1 (CFexpress) and Slot 2 (V60 SD). ✅
Coordinate with the henna artist to pause for 15 minutes before the bride's hands are fully covered. Shoot the signature seated portraits, overhead mandala angles, and macro engagement ring shots while her posture is fresh. ✅
Ingest memory cards immediately. Export optimized web previews, upload them to your studio's Pixelect SmartSelection portal, and send the couple their personalized WhatsApp PIN gallery within 48 hours. ✅
❓ 6. Frequently Asked Questions (FAQs)
Q1: How can our studio capture deep dark mahogany henna stains when the actual wedding takes place two days later?
Henna stains take 48 to 72 hours to oxidize and reach their deepest, dark-mahogany hue. During the Mehendi ceremony itself, you will only be documenting the greenish-brown wet or dried paste. To deliver complete storytelling for the wedding album, always schedule a quick 10-minute "Henna Stain & Bridal Ring" portrait session during the Haldi or Wedding Day morning prep. By then, the paste has fallen away, revealing the rich, dark crimson-brown stain that pairs magnificently with traditional wedding day gold jewelry.
Q2: What is the optimal lens combination for a fast-moving, crowded Indian Mehendi event?
For a standard two-shooter team, Shooter A should mount a fast 35mm f/1.4 to capture broad environmental decor, group dance performances, dholak singers, and wide candid interactions. Shooter B should operate an 85mm f/1.4 or 90mm f/2.8 Macro lens to isolate the bride’s expressions, capture intricate close-ups of henna patterns, and frame flattering compressed portraits without invading the bride's personal space or colliding with the henna artists' work stools.
Q3: How do we prevent wet henna from smudging onto expensive designer lehengas during couple portraits?
Wet henna accidents are a studio liability nightmare. Never direct physical embraces, hand-holding, or close couple hugs while henna is fresh. Instead, create visual intimacy through spatial layering: have the groom stand slightly behind the bride's armchair, resting his hands gently on the top of the wooden chair back rather than her shoulders. Have him lean in to whisper a joke in her ear while she gazes down at her hands. This produces romantic, emotionally connected couple portraits with zero physical risk to the bridal outfit.
Stop Spending 4 Hours Copying Selected RAWs Manually. Switch to Pixelect SmartSelection.
Indian wedding photographers shoot thousands of photos per event. Don't let your editors waste entire afternoons searching filenames across multi-terabyte external hard drives. With Pixelect SmartSelection, your clients select their favorite photos on a stunning, mobile-first WhatsApp gallery, and our proprietary desktop engine extracts and auto-copies all selected RAW files in just 15 seconds.